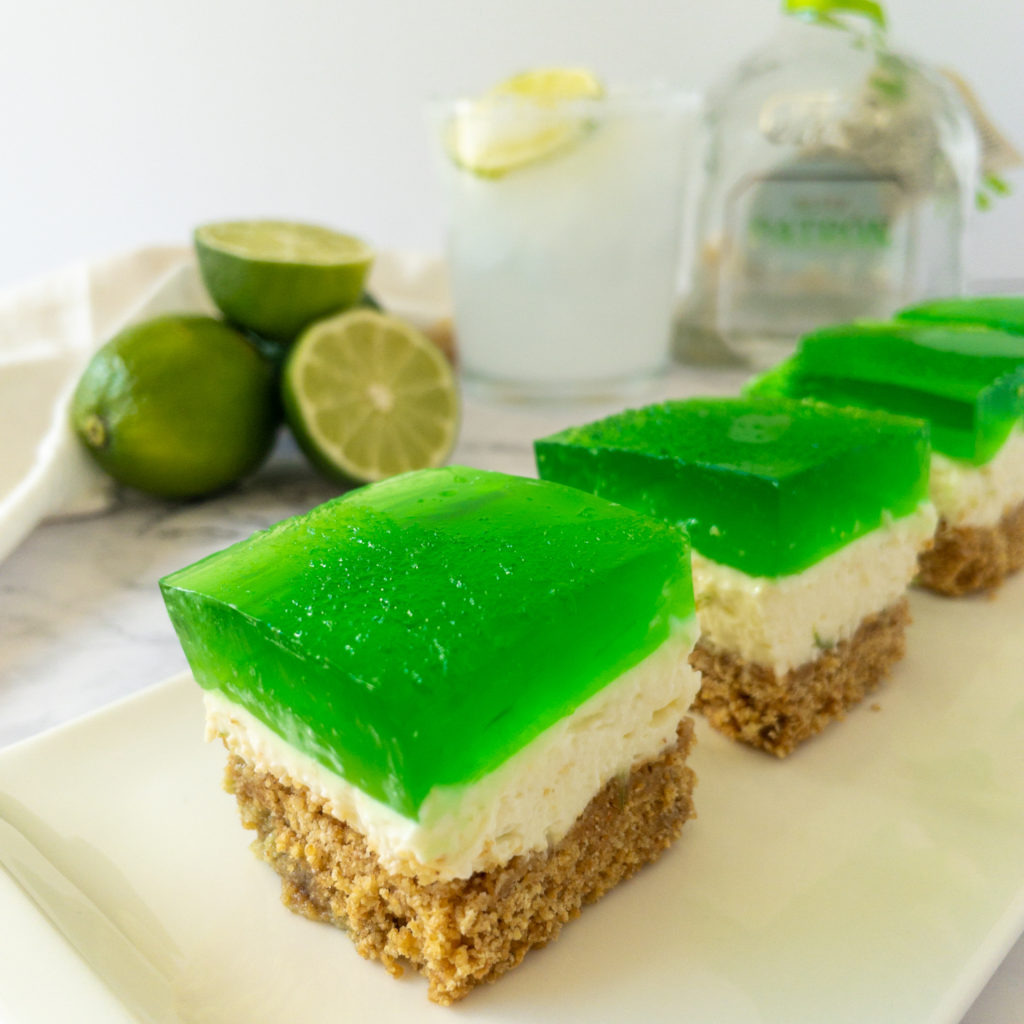
My mum makes a really good no bake jello slice, well in New Zealand we call it jelly. When I saw that national margarita day was coming I knew I wanted to put a spin on her jelly slice and incorporate tequila and lime jelly rather than the traditional raspberry. I also felt like a cheesecake layer would pair better with the tart citrus than the traditional sweet creamy layer in her recipe. Hence my no bake margarita cheesecake bars were born!
What do you need to make no bake margarita cheesecake bars?
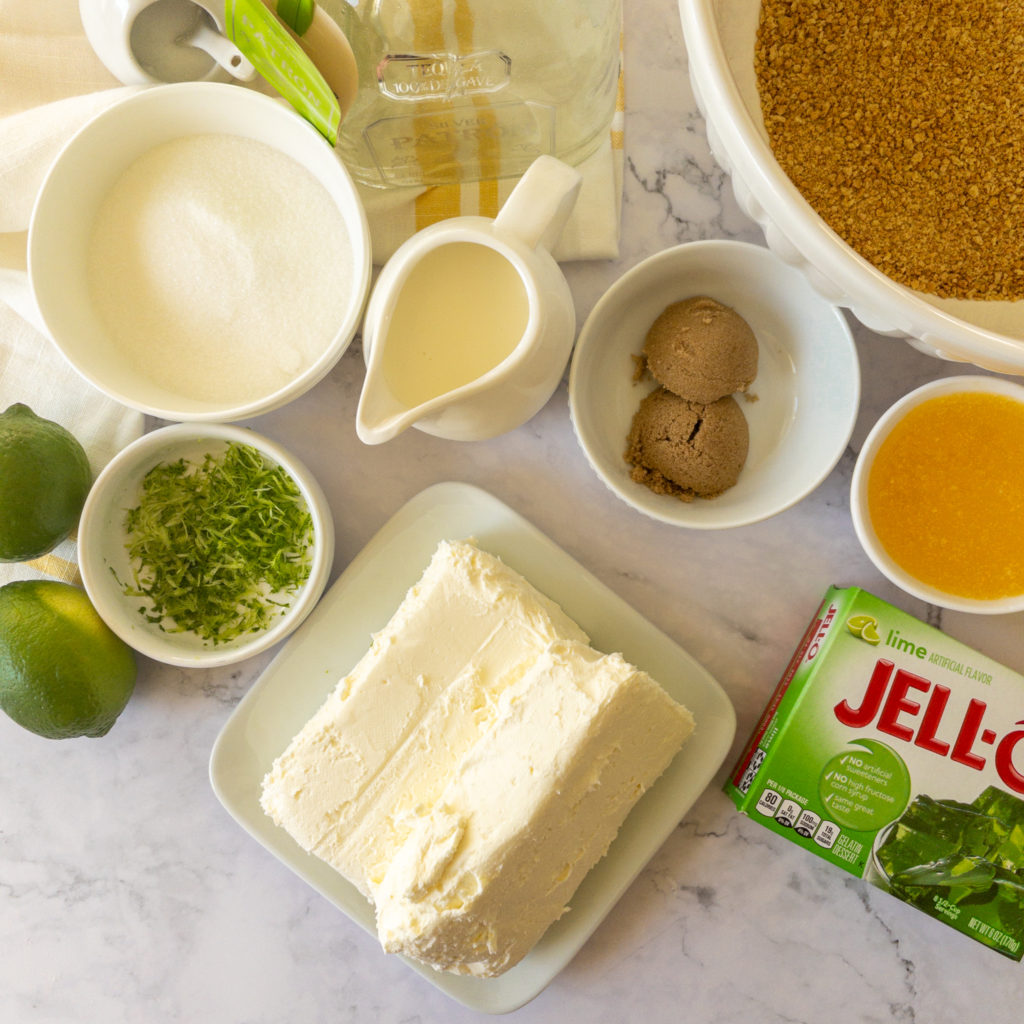
- Graham cracker crumbs
- Salted butter
- Brown sugar
- Heavy whipping cream
- Cream cheese
- Granulated sugar
- Lime zest
- Lime jello
- Water
- Tequila (optional, but extra good 😉)
Making no bake margarita cheesecake bars
Making these no bake margarita cheesecake bars is SUPER simple. The time required to make them on the other hand is lengthy. The reason being that two of the three layers require a minimum of three hours each to set. The end result is totally worth it though! Plus, you can always make these the day before you plan to eat them so there is one less thing for you to do the day of!
The first step in making these no bake cheesecake bars is to line both the bottom and sides of your pan with parchment paper. Correctly lining the pan will set you up for a clean and successful removal of the cheesecake once everything is set. When lining the pan you want the parchment to overhang the rim by about and inch and a half on each side. This will give you something hang on to when lifting out the cheesecake.

The crust
Next you will form the crust by mixing the graham cracker crumbs, melted salted butter and sugar. You can typically find graham cracker crumbs at the grocery store in the baking aisle. However, if you cannot find them they are easy enough to make with a rolling pin or in the food processor. Check out my tips on making crumbs for cracker crusts in my Apricot Magic Bar recipe.
If you like a salt rimmed margarita, I would strongly encourage you to stick with the salted butter called for in the recipe. If you do not have salted butter, I would recommend reducing the brown sugar in the crust by half.
Once you have spread the crust evenly into the pan you will want to firmly press the crumb mixture down. I like to use a flat bottom glass to do this. Pressing the crumb firmly will help ensure your crust holds it shape when removed from the pan and cut.

The cheesecake layer
The cheesecake layer is essentially a combination of whipped cream, beaten creamed cheese and sugar. First you will want to beat the heavy whipping cream until whipped cream is formed. I like to do this with my hand mixer as I use my stand mixer for beating the cream cheese.
Next beat the cream cheese, sugar and lime zest for a couple of minutes until light and fluffy. You want the cream cheese to be fluffy before you add the whipped cream to avoid lumps! A stand mixer with paddle attachment works great for this. Finally combine the whipped cream and cream cheese mixture until well combined.
Add the cream cheese mixture to the crust and refrigerate until set. This is one of the time consuming steps. The cheesecake should chill for a minimum of three hours, but is best chilled overnight. My cheesecake layer was adapted from Kim Beaulieu’s no bake cherry cheesecake recipe.

The final step….kinda
Finally, you will create the jello layer for the top of the cheesecake. This step is very easy and requires making jello with the cheeky addition of tequila! You will want to stir the jello with the hot water for a full three minutes before adding the cold water and tequila. This will ensure the gelatin completely dissolves and activates.
Let the mixture cool before pouring over the cheesecake base. If you pour the jello over the cheesecake base will it is still warm you run the risk of melting the cheesecake and ruining those beautiful layers.
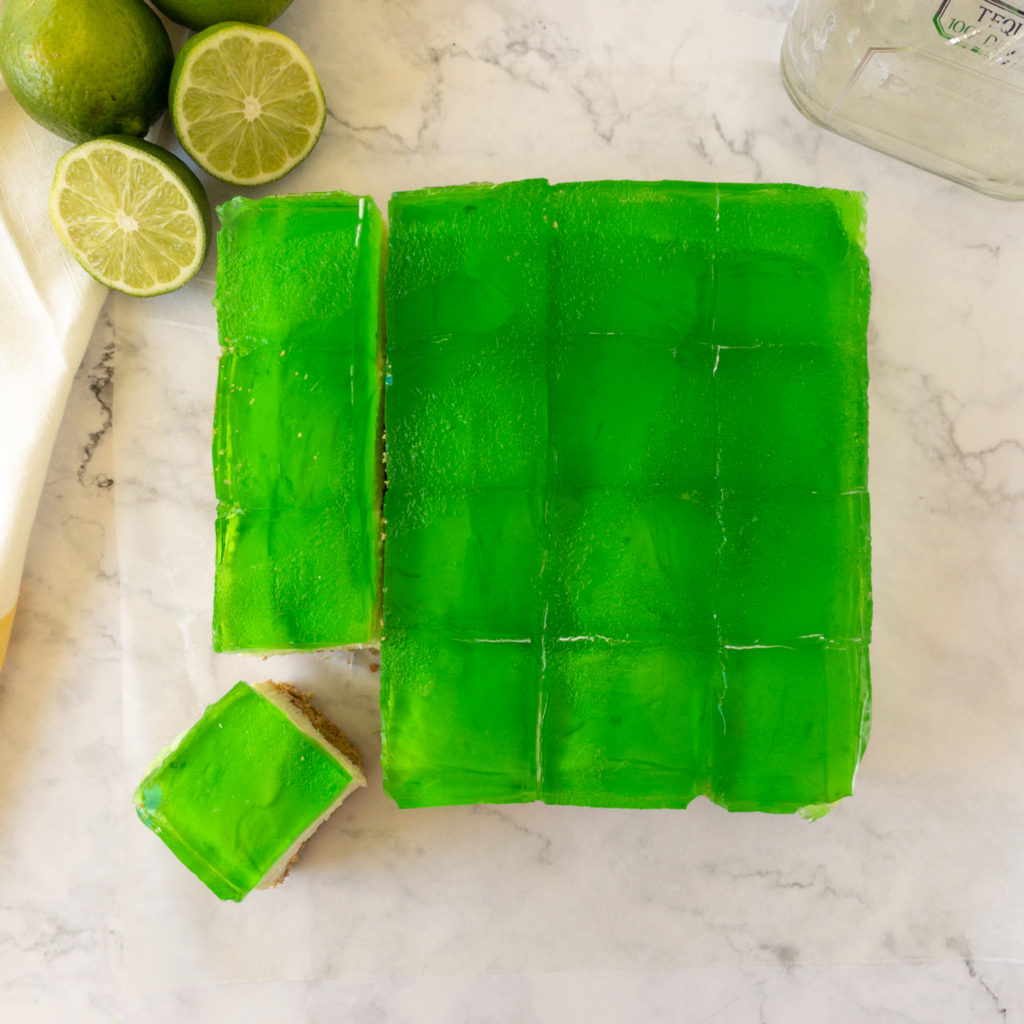
The real final step
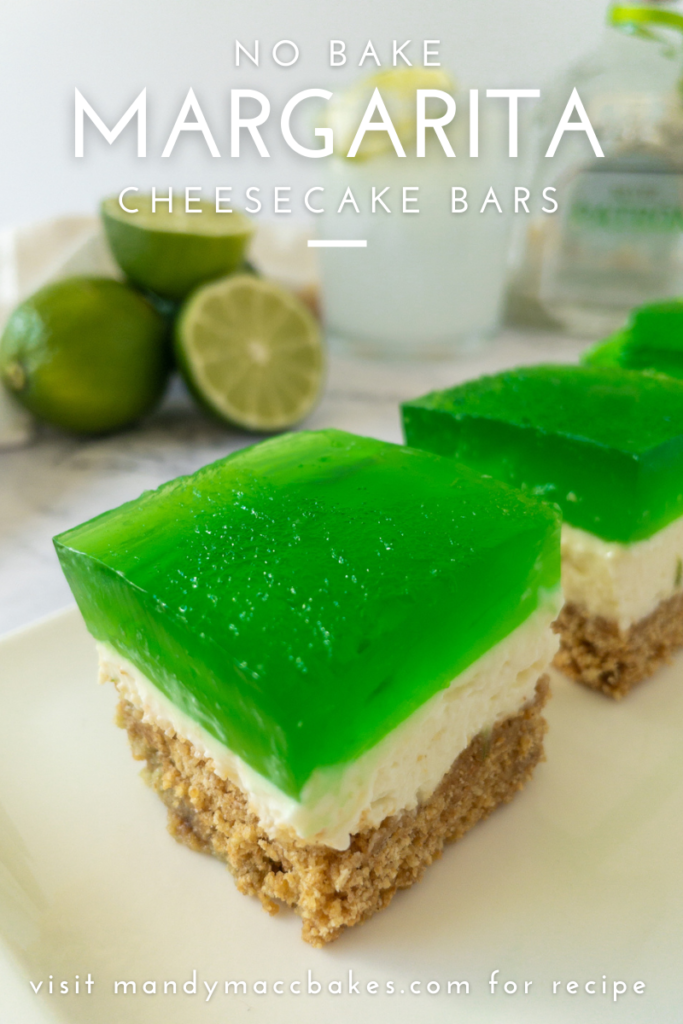
Once again, you will need to test your patience as you wait for the jello layer to set. This will take a minimum of three hours. Once the jello is set remove the cheesecake from the pan by lifting the parchment overhangs. Cut the cheesecake bars with a sharp knife cleaning the knife after each cut. You want to do this so you do not get cheesecake smeared on the vibrant green jello layer. Next step, ENJOY!
Did you make this recipe? I’d love to hear your thoughts in the comments below. Don’t forget to tag us in your pics on Instagram!


No Bake Margarita Cheesecake Bars
Description
These easy no bake margarita cheesecake bars are creamy and tart with a little kick of tequila.
Ingredients
Crust
Cheesecake Layer
Tequila Lime Layer
Instructions
Crust
-
Line base and sides of a 8x8" pan with parchment paper and set aside
-
Mix graham cracker crumbs, sugar and melted butter until well combined
-
Evenly spread crumb mixture into prepared pan, pressing down to pack the crust
Cheesecake Layer
-
In a medium bowl whip heavy cream with a hand or stick mixer until stiff, then set aside
-
In a separate bowl beat cream cheese, sugar and lime zest until light and fluffy, about 3 minutes
-
Pour cheesecake filling over crust using a spoon or spatula to evenly spread the mixture
-
Chill the cheesecake in the fridge until set. Minimum of 3 hours, but preferably overnight
Tequila Lime Layer
-
In a medium bowl mix lime jello and boiling water until completely dissolved, approximately 3 minutes
-
Add cold water and tequila to jello mixture and stir to combine
-
Let jello mixture cool then pour over the cheesecake layer
-
Return cheesecake to fridge until jello is set, approximately 3 hours
-
Once set remove the cheesecake from the pan and use a sharp knife to cut into squares
Okay you just made my day! I’m making these pronto!!
Haha, I love that! They are definitely a fun dessert.
Oh my gosh, these look so good! I would have never thought of anything like these! I just might have to try this recipe!
I saw these on your Instagram the day you made them and my mouth was watering! I really want to make these for my best girlfriends when we finally get to have a mom’s weekend! Thank you for sharing.
Hopefully that will be sooner than later! I’m looking forward to getting together with my friends and family too!
Perfect for St. Patrick’s Day! Definitely going to give this a try!
You are right, the green color is perfect for St. Patrick’s day. I didn’t think of that!🍀
This is a nice, neat, and easy treat! I can almost taste it from looking at your photos.
What a fun looking , colorful dessert! I can’t wait to try out the recipes. Maybe for St. Patrick’s day?